
User Manual
app2dat for members
Everything you need as a member: create an account, join your club, chat, keep track of sessions and attendance, pay fees. Step by step — for reading up and looking things up.
What is app2dat?
app2dat connects you with your clubs, associations and communities. The core idea: One profile. All your clubs. You maintain your data exactly once — and share it selectively with the organizations you belong to. If your phone number changes, you change it in one place; all your clubs are up to date instantly.
- One profile, many clubs: Your master data belongs to you. You decide per group who sees what.
- Real-time communication: Group chats, private messages, surveys and announcements — instantly on all devices.
- Sessions & attendance: Trainings, courses and events in your calendar; sign up or off with one tap.
- Fees: View membership fees and pay them right in the app.
- Everywhere: As a web app in the browser and as an app for Android, iOS and Windows — always in sync, usable offline too.
Family-friendly: One account can hold several profiles — your own, your children's, and even organization profiles you manage.
Installation & account
Install the app
The fastest way: the web app at m.app2dat.com — it runs right in the browser, no installation required. For the best experience, install it as an app (PWA):
- Open m.app2dat.com in your browser.
- On the start page tap Install app. In Chrome, Edge and on Android the installation starts right away; on iPhone the guide shows you the way via the share icon → Add to Home Screen.
- From then on app2dat starts like a normal app from your home screen.
Important for push notifications: In the browser, notifications only work reliably in the installed app. The native apps for Android, iOS and Windows are coming to the stores soon.
Create an account
- On the sign-in page choose Register new user account.
- Enter your email address and a password (at least 8 characters, with upper and lower case, digit and special character) and accept the terms of use.
- You will receive an activation email — activate the account via the link inside, done.
Alternatively, sign in without a password of your own with Google or Apple — the buttons are right on the sign-in page.
Signing in & forgotten password
Email and password are all you need to sign in. If you forgot your password, choose Forgot password — you receive a recovery email and set a new password yourself.
Two-factor sign-in (2FA): If you have enabled 2FA (see Settings & security), every sign-in additionally asks for a 6-digit code sent to you by email.
Registration via a club link
Many clubs invite via a link or QR code (notice board, website, message). Following such a link, a form guides you through registration: account (email/password), profile data (first name, last name, gender, date of birth) and optionally address and phone. For minors a legal guardian is recorded as well — app2dat automatically creates a separate profile for them as contact person. If the group is protected, the form asks for the group PIN your club gives you.
The app at a glance
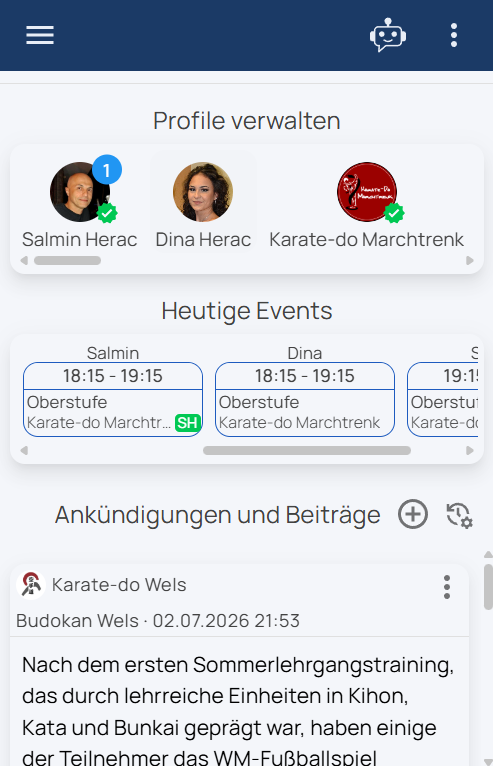
After signing in you land on the start page. It shows three areas:
- Manage profiles — all your profiles as round avatars: your personal one, your children's, your organizations. A number badge shows unread notifications, a green checkmark the verification status. Tapping opens the profile.
- Today's events — your sessions of the day as cards with time and group.
- Announcements and posts — the feed of your clubs: the digital notice board (see Stories & feed).
Navigation
- ☰ Hamburger menu (top left) — opens the profile list for quick profile switching. There are no settings here.
- User menu (top right) — new profiles, language, theme, security, info and logout (see Settings).
- AI Assistant — the help bot as a side panel, answers questions right in the app (see AI Assistant).
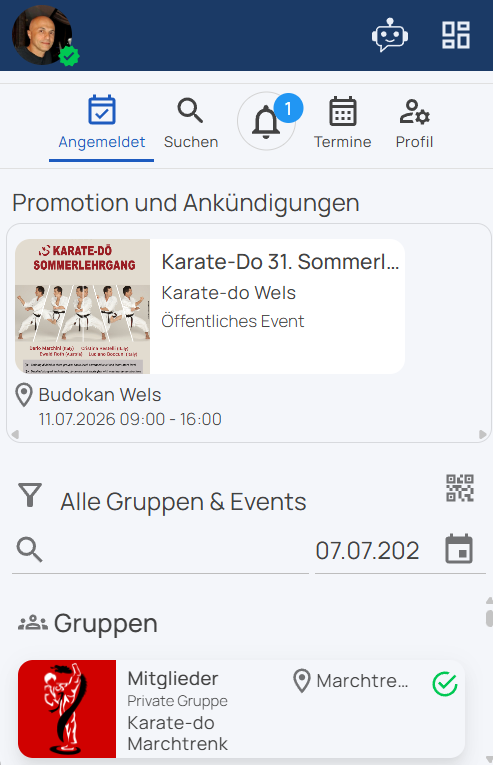
Your personal profile has five tabs
| Tab | What you find there |
|---|---|
| Registered | All groups and events you are registered with — including status and search. |
| Search | Find public organizations, groups and events — by location, date and category. |
| Notifications | Invitations, news, private messages and your contacts. |
| Sessions | Your weekly calendar across all clubs. |
| Profile | Your master data, profile ID with PIN and QR code, verification. |
Profiles
One account can hold several profiles. A personal profile represents a person; an organization profile represents a club (more on this in the Administration Manual).
Create a new profile
- Open the user menu at the top right.
- Choose New person (or New organization for a club).
- Enter first name and last name (both mandatory; for an organisation instead name and description) — done. The app switches straight to the new profile. Date of birth, gender, picture and everything else follow afterwards in the Profile tab.
Child profiles
For children you simply create another personal profile under your account — there is no separate "child profile" menu. A child profile is an ordinary personal profile that app2dat recognises as such from the date of birth (age under 16). You manage it alongside yours; a contact person (e.g. you as legal guardian) can be stored in the profile. That way you sign your child up for training with two taps — without a separate account.
Edit your profile
In the Profile tab you maintain your profile picture, master data, contact details and address. Every change is saved immediately — there is no save button. While a mandatory field is empty, a warning is shown. Mandatory are: first name, last name, gender, date of birth and ID number; the title is optional. In addition:
- Interests — control which events and suggestions match you. They are optional: without interests you get every hit within the radius, set interests narrow the search. For a single, targeted search you can override them temporarily in the Search tab without changing anything here.
- Contact persons — e.g. the contact person of a child profile.
- Check location — validates your address for distance search and nearby events. This has nothing to do with verification.
If you are already verified, some fields are identity-relevant: changing first name, last name, date of birth, ID number or city/country triggers a confirmation — if you confirm, the verification is reset and has to be done again. Contact details, street, postcode, picture and interests can be changed freely at any time.
Choosing your interests
Interests are organised in two levels: a main category and, below it, an optional subcategory — for example “Martial arts” with the subcategories “Karate”, “Kung fu” or “Judo”. Pick as many as you like.
A main category and its subcategories find each other. So you never have to guess how precisely a club has filed itself:
| Your interest | What the club offers | Will you find it? |
|---|---|---|
| Martial arts | Martial arts | Yes |
| Martial arts | Martial arts → Karate | Yes — the broader term includes everything below it |
| Martial arts → Karate | Martial arts | Yes — more general clubs match you too |
| Martial arts → Karate | Martial arts → Karate | Yes |
| Martial arts → Karate | Martial arts → Kung fu | No — two different subcategories |
If you select a main category, all of its subcategories are covered automatically — individually ticked subcategories are removed when saving because they are already included. To search broadly, pick the broader term; to target Karate only, pick the subcategory.
No results? It is almost never the interests: if you have stored none at all, the search simply does not filter by them and shows everything within the radius. Check your address instead — without Check location the app does not know where you are and the distance search stays empty.
And if you only want to look for something else once, you need not change anything here: in the Search tab you switch categories temporarily via Search categories — see Joining clubs & groups.
Your profile ID + PIN: In the profile tab you find your profile ID (P…) with PIN and QR code. A club uses it to add you directly as a member — show the QR code at the desk, scan, done.
Data sovereignty: Each group only sees the fields it really needs and that you share. If you leave, the club's access to your data ends.
What the profile PIN is for
Next to the profile ID sits a PIN field. It is extra protection against unwanted invitations: with a PIN set, a club cannot simply add you to a group — it then needs the ID and the PIN (unless you are already in another group of the same club). The catch: this also makes wanted additions harder.
Recommendation: leave the field empty at first and watch whether unwanted invitations actually appear over time — only then is a PIN worth it.
Joining clubs & groups
There are five ways into a group — pick the most convenient:
Open an invitation link
The easiest route: the club sends you a link of the form https://m.app2dat.com?reg=12345 — by email, messenger or as a clickable group card in a chat. Tapping it opens app2dat, asks Select profile for registration and starts the registration. If you do not use app2dat yet, the setup walks you through creating an account first and then lands in the same registration. The link is not tied to a person and does not expire.
Scan a QR code
In the Search or Registered tab tap the QR symbol and scan your club's invitation QR. Group and provider are displayed — join with Register.
Enter group code + PIN
In the same dialog you can type the group ID (format "G…") by hand instead of scanning. If the club has set a PIN, you enter it as well — your club gives you both.
Search & register
The Search tab finds public groups and events — filterable by text, date, distance and Search categories. Tapping opens the info with participation conditions; choose Register there.
Search on purpose without changing your profile: next to the search field sits Search categories. There you pick different topics for a single search — the interests in your profile stay as they are. The selection starts empty — you set exactly what you are after right now instead of unticking inherited boxes first. While it is in effect the button is coloured; the circular-arrow icon at the top right of the blue info bar clears it again, and after Ok your interests apply once more. Switching profiles clears it anyway.
Accept an invitation
If a club invites you directly, the invitation appears in the Notifications tab — accept or decline, done.
Understanding the status: Depending on the group settings your join is either active immediately or waits as requested for approval by the management. Unregistering may require confirmation too. You always see the current status in the Registered tab.
Why it sometimes fails: the club can set conditions that are checked on joining — a minimum or maximum age, a cap on the number of participants, or the rule that only verified profiles are admitted. If something does not fit, app2dat rejects the registration with a matching message. And: the PIN is contained neither in the link nor in the QR code — if the group has one, you need to get it from the club separately.
Leaving a group
In the Registered tab open the group via its info icon and choose Unregister in the dialog. Confirm with your security PIN. Through the same dialog you can later choose Register again.
Do not confuse: this ends your membership in the group. To miss just a single session, you stay a member and unregister in the Sessions tab (see Sessions & attendance).
Using groups
When you open a group you see a tab bar. Which tabs appear depends on the group type:
- Chats — the group's conversation topics, read and join in.
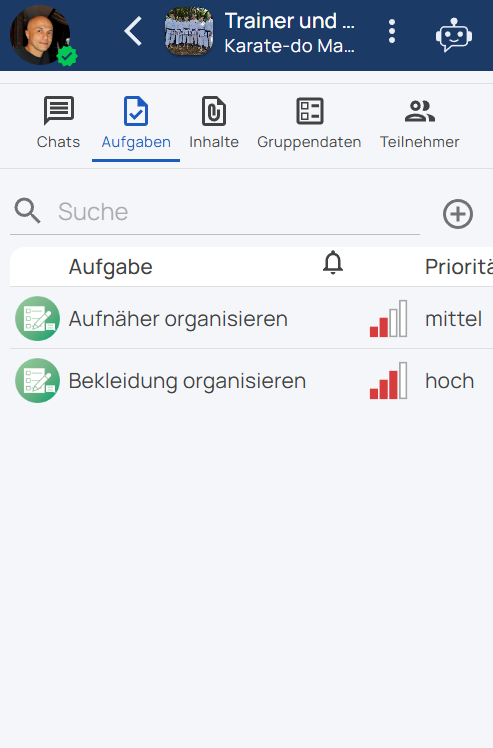
- Tasks — task list with priorities and due dates.
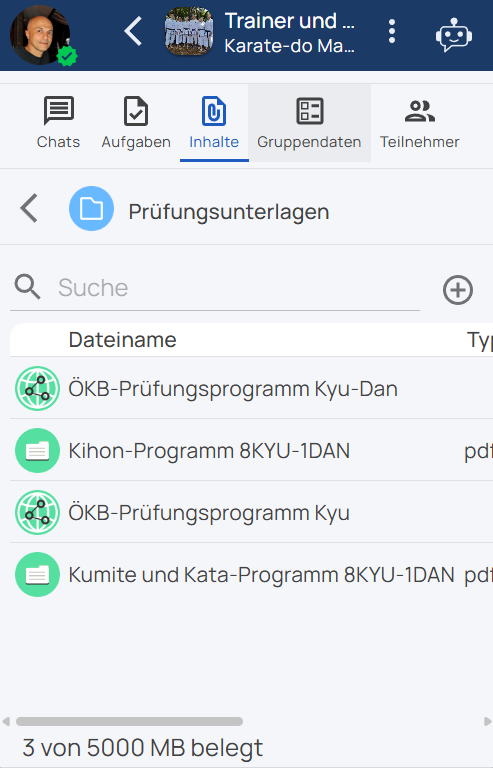
- Content — shared documents, folders and links.
- Group data — your data fields for this group (see next chapter).
- Participants — the member list, if the club has enabled it. Tapping a name opens Private message — write to other members directly and pin them as a contact in the chat.
- Sessions — the session calendar (event groups only).
The bell column next to chats and tasks counts your unread messages — it is a display only, not an on/off switch.
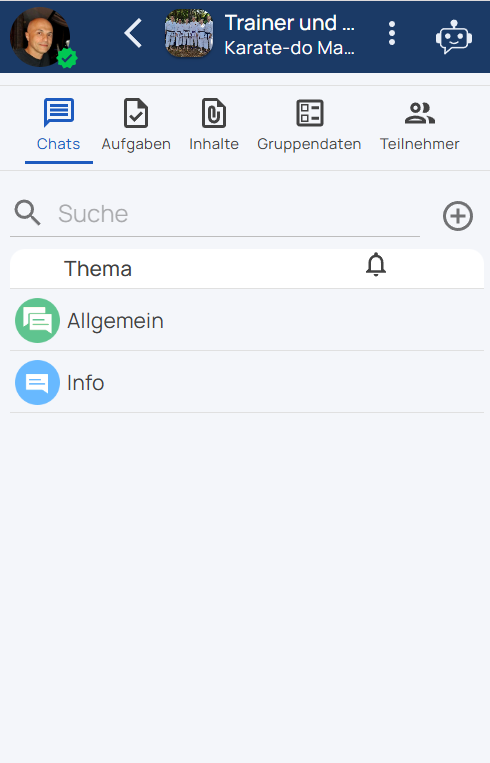
Group types: Standard groups bundle communication and content. Event groups additionally have session management with attendance — typical for training groups and courses.
Filling in group data
Each group can define its own data fields — for example phone number, clothing size, belt grade or the membership fee. This is the heart of "maintain data once": the club only asks for what it really needs, and you fill it in yourself.
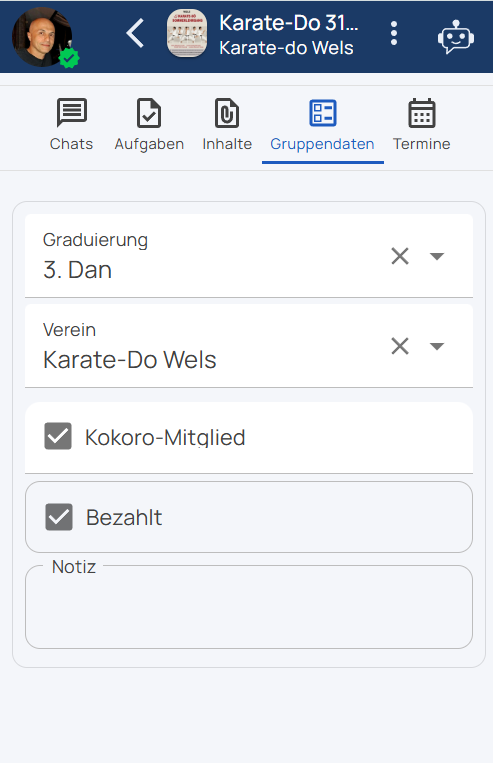
The Group data tab shows all fields of the group:
- Editable fields you fill in directly — text, number, date, time, yes/no or a choice from a list.
- Read-only fields were made visible for you by the management (e.g. your grading).
- File fields: Upload requested documents (e.g. a medical certificate) or open provided files.
- Payment fields show your fee status: open (red) or paid (green) — tapping opens the payment (see Paying fees).
The small info icon on a field shows the club's explanation of what to enter.
Group chat
Communication is organized by topics — such as "General", "Training" or "Questions". That keeps every conversation findable.
For a topic to appear for you at all, your personal profile must meet two conditions: it must be a member of the group and be listed in that topic's member list ("All members" or explicitly added). If either is missing, the topic does not show up — ask the group management to add you. Chats also require a personal profile: with an organisation profile you only get a note asking you to switch to a personal one.
Writing messages
Open a topic, type your text, send . Via the paperclip you attach content:
- upload a file or image — at most 5 files, up to 30 MB each,
- insert a link (with preview) — at most 5 links,
- create a survey (see next chapter).
A message carries either a survey or files and links — not both.
Links come from the clipboard. There is deliberately no input field for the address: copy the URL first (from the browser, from an email), then choose "Insert link" — app2dat takes it as long as it starts with http or https. And: a link in the middle of the text is not clickable. If you type https://… straight into the message, app2dat warns you when sending and offers to attach it instead — take that offer, otherwise the recipient cannot open it.
Reacting to messages
Tap a message — the action menu offers, depending on the situation:
- add an emoji reaction (reactions appear below the message),
- copy text, download attachment,
- edit or delete your own messages,
- Seen by — who has already read the message,
- start a private message to the author.
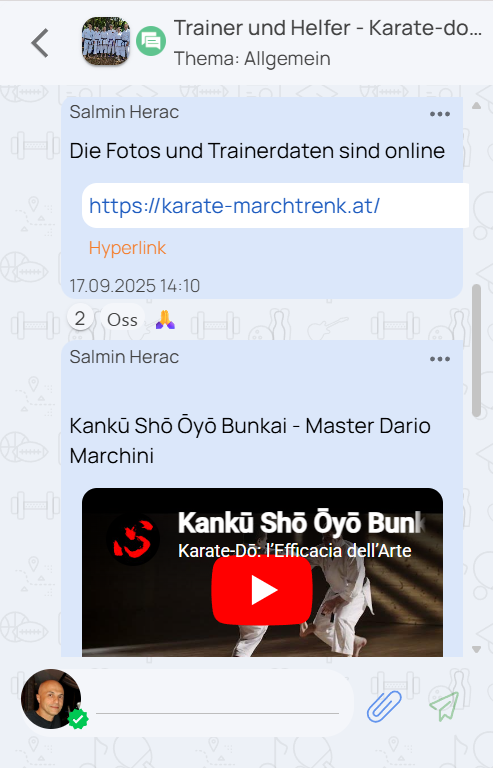
Info topics: In some topics commenting is switched off — there only the club's contact persons write, everyone else reads along. You recognise them by the missing input field. Public announcements to everyone do not run through the chat but through the feed on the start page (see Stories & feed).
Surveys
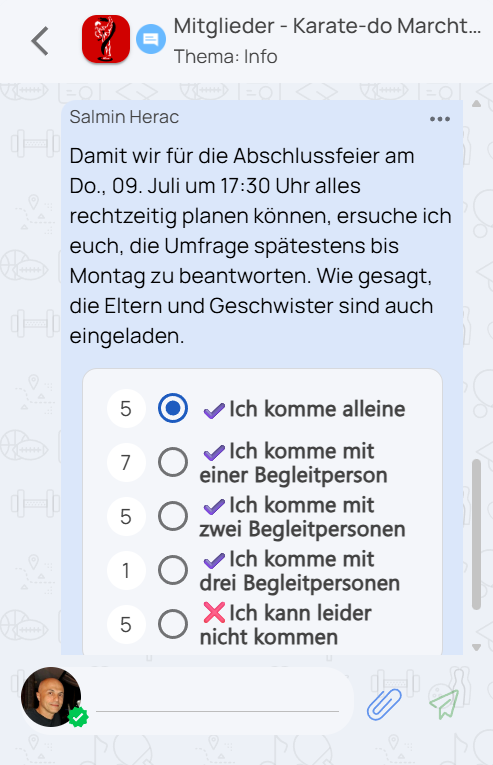
Surveys run right in the chat: "Who's coming to the tournament on Saturday?" — vote with a tap on the answer option in the message.
- Depending on the settings, one answer or multiple answers are possible.
- In anonymous surveys only counts are shown, no names.
- If "show results only after closing" is active, you see no numbers at all while the survey is running — the results appear only once the survey is closed. Voting yourself does not change that; this keeps early votes from influencing later ones.
- A locked survey is closed — voting is no longer possible.
Open the results via the action menu of the survey message (Survey results).
How to create a survey yourself is described in Group chat: paperclip → Create survey — choose question, answer options (optionally with emoji) and settings, send.
Messages & contacts
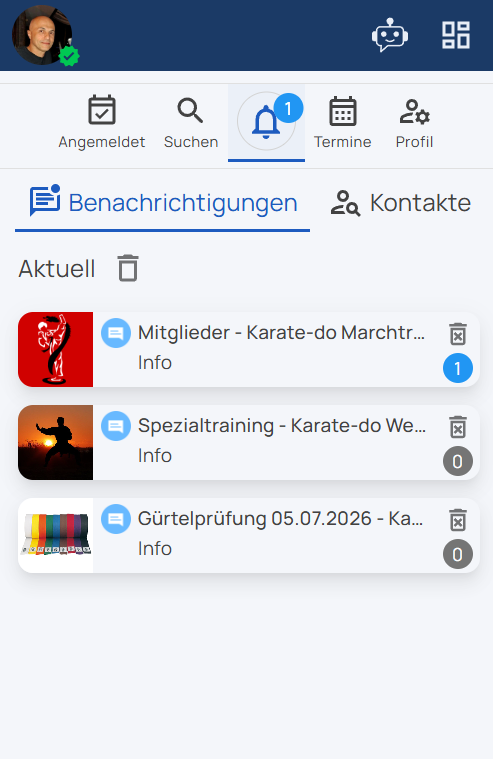
The Notifications tab in your profile bundles everything personal — the badge shows the unread count.
Notifications
- Invitations to groups and events — accept or decline directly.
- Latest: new topics, tasks, status changes and private messages.
- Pin chat: A group chat only appears here once a new message arrives. The pin symbol at the top right of the chat brings it into the list beforehand — with counter 0. Tapping again removes it.
- Delete single entries or remove all already-read ones at once.
Private messages
Direct messages are only visible to you and the other person. You start them from a group's member list, from the chat (action menu of a message) or from your contact list. Attachments, emoji reactions plus editing and deleting your own messages work here too.
Adding, pinning & blocking contacts
- Add: In the Contacts sub-tab, the QR symbol next to the search field opens the "Add contact" dialog — scan the person's profile QR code or type in the profile ID (P…). Only person profiles can be added; if the profile has a PIN, it is requested.
- Pin: The pin symbol in the private chat remembers the contact in your contact list.
- Block contact: Via the menu in the private chat — the person can no longer send you messages. You find (and unblock) blocked contacts via Show blocked.
Sessions & attendance
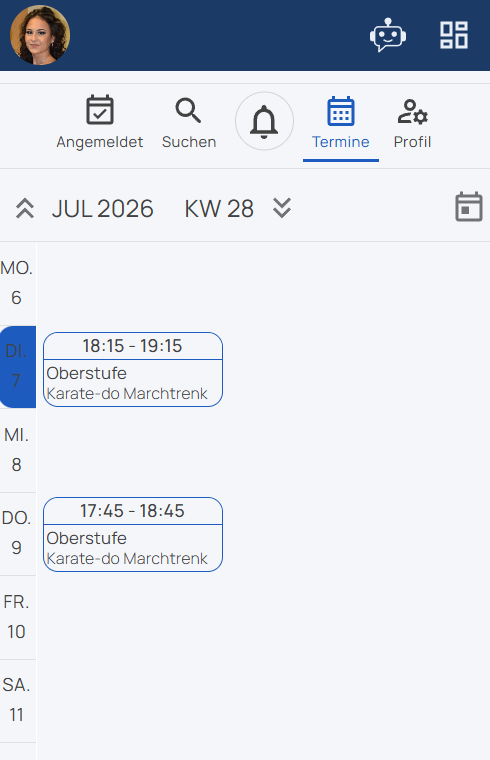
The Sessions tab shows your weekly calendar across all clubs — two weeks per view, colored cards per group, today is highlighted. Your sessions of the day are also right on the start page.
Only event groups (trainings, courses, events) have appointments. Standard groups keep no calendar and do not appear here. What you see are the sessions of this profile — if you hold several personal profiles, switch profile or use "Today's events" on the start page, which bundles all profiles but covers today only.
What you can do in the calendar
- Browse the weeks with the double arrows (or swipe vertically), jump back with Today.
- Past sessions are grey — with a green ✓ if you are recorded as present, otherwise ◌. Cancelled sessions appear orange and struck through.
- Tap a session for details and actions.
Signing up and off
Via Register/Unregister in the session you sign up or off — set the switch to "Absent", optionally leave a comment (e.g. "15 minutes late") and confirm with OK. This only works while the session has not started yet — after that the switch is locked and the report reads "Completed". The same way takes you back to "Present".
Do not confuse: this is about a single session — your membership in the group stays. To leave the group entirely, use the Registered tab.
Who is responsible for the session?
In the session card menu, Responsibility opens the responsibility list with the people assigned — e.g. your coach — including email and phone number. Tapping an entry copies the contact details to the clipboard. Green initials on a card mean: you yourself are assigned to that session; other people's initials do not appear in this view.
Attendance by QR
At many clubs you simply check in at the entrance with your profile QR code (profile tab) — the coach scans, your attendance is documented. Without a phone at hand, the club prints the code as a membership card.
Running the attendance list yourself
If you are responsible for a session — as a coach or supervisor, say — the session card menu additionally offers Attendance. It opens the participant list full screen where you tick off who was there, or scan the profile QR codes. Every tick is saved immediately; without a connection the change goes out later automatically. Filling in afterwards is always possible, even days after the session — after the start time only a participant's own response via "Register/Unregister" is locked. Who may be responsible is decided by the club's management.
You reach the very same list from three places: "Today's events" on the start page, here in your profile's Sessions tab, or in the Sessions tab of the opened group.
Cancellations: If a session is cancelled you see the cancellation with the reason right on the session — and you are notified. For a cancelled session the menu items "Attendance" and "Responsibility" are not available.
Tasks
The Tasks tab of a group shows what needs doing — from the bake sale to washing the jerseys. Every task shows:
- priority (none, low, medium, high, highest),
- due date as "by date" and "by time",
- status (open, in progress, done, cancelled) plus the date of the last change,
- the recorded effort.
Behind every task sits its own task chat: tap the row — whether on the name, the priority or the status — and the chat opens with your active profile. Ask questions and comment on progress there. As a member you can read the work data but not change it; that is the club management's job. The bell column counts your unread messages.
Whether you may write in a task is decided — just as in the chat — by the comments setting: if it is off, no input field appears at all and only the club's contact persons write.
Documents & content
In the Content tab your club provides material — neatly organized in folders:
- Documents — view and download PDFs, images and other files.
- Folders — content grouped in folders, navigate with the back arrow.
- Links — external web addresses with preview; open or copy via context menu.
The search field helps you find content again quickly.
Paying fees
Membership fees appear as payment fields in the group data: open (red) or paid (green). An open fee can be settled right in the app:
- Open the group → Group data tab → tap the open amount.
- Choose your payment method:
- Pay by card/online — opens the Stripe payment page in the external browser (no customer account with the payment service needed); the app then checks the incoming payment automatically,
- Copy IBAN — transfer the classic way yourself,
- Set up subscription (card/online) — pay recurring fees automatically via Stripe subscription (cancel anytime). The button shows the amount that will be charged: always the amount of your current payment request — an individually reduced fee therefore applies in the subscription as well.
- After payment, Download PDF provides the payment confirmation for the fee.
Recurring fees (e.g. monthly) automatically create a new payment request when due. If you pay cash or by bank transfer, the management books the receipt — the status turns green.
Stories & feed
The "Announcements and posts" feed on the start page is your clubs' notice board: news, photos, event announcements and shared links. Which posts you see follows the radius around your location and your interests — not your group memberships. If the author limited a post to certain languages, it only reaches you when your app language matches. Unread ones come first.
What you need to create a post
A post can only be created with a profile that meets three conditions:
- a verified personal profile aged 16 or over or a verified organisation profile (profiles of children under 16 cannot create posts),
- a checked location (Profile tab → "Check location"),
- at least one category or interest.
The app tells you what is still missing as soon as you tap Add post: without a suitable verified profile the verification notice opens, otherwise you get "The profile location is required!" or "Please select at least one category!".
Create your own story
- Tap the on the feed on the start page and pick a suitable profile.
- Write your text (up to 5000 characters); optionally add a photo, link, categories, location and languages; allow or disable comments. Counted together, up to five attachments are possible — images (JPG/PNG) and links (YouTube, Google Drive, app2dat groups and events). A link is always taken from the clipboard; there is no input field for it.
- Save — the post appears in the feed of people whose location and interests match; how long it stays visible is controlled by app2dat.
Linking to an app2dat group: this only works while that group is public and actively promoted (otherwise the app reports "This group cannot be linked!"). Once the club's promotion ends, the post with the group card drops out of the feed again. Posts without a group link are unaffected.
Publishing in several languages
A post can carry several language versions in one single text. Put a language marker in front of each version — the buttons below the text field insert them:
[lang:en] Friday training is cancelled.[lang:de] Das Training am Freitag entfällt.
Every reader only sees the version in their own language. If it is missing, the app shows English. A text without markers is shown to everyone unchanged.
Separately from that, the Languages selection below the location decides who gets to see the post at all: if you select nothing, everyone sees it. If you select only German, for example, it appears solely for readers whose app is set to German. In "My posts" you always see your own posts, regardless of this.
React & manage
- Emoji reactions (one emoji per person, switchable) and comments below every post — the comment button only appears if the author allowed comments. Commenting requires a verified personal profile; otherwise a notice replaces the input field.
- In the "My posts" view, your own posts can be filtered by profile, searched in full text and narrowed by date.
- Via a story's context menu: edit, delete, share your own posts — hide or report others'.
Verifying your profile
Verification confirms your real identity — your profile then carries a green checkmark. That builds trust in the club and is the foundation of verified communities.
- Open your profile → Profile tab → Verify now.
- If your master data (first name, last name, gender, date of birth, ID number) is complete, you continue directly; if something is missing, the app points it out.
- Purchase the verification and start the ID check: a guided scan of your ID with face matching via the certified service Didit.
- The result comes back automatically — on success your profile is verified. If the automatic check fails, you can request a manual review by the app2dat team.
| Verification | Cost | Validity |
|---|---|---|
| Person (16+) | paid, yearly | 1 year, renew afterwards |
| Child under 16 | free | until the 16th birthday |
| Organization | paid, yearly | 1 year, renew afterwards |
The app shows you the cost: you see the valid price and currency before the purchase in the verification dialog. It depends on the payment route — in the app store (Apple, Google) it is slightly higher than paying by card/online, because the store commission is included there. An organisation costs more than a person.
Automatic renewal: Clicking the green Verified until button opens the verification dialog with the switch Auto-renew. With it, your verification renews automatically every year without uploading your documents again; you can switch it on or off at any time. If it is off, the dialog points out that a renewal is only possible after expiry, because a new payment is required. Once expired, you renew manually and choose: existing data still valid (fee only) or update and re-check the data. Child profiles under 16 have no auto-renew switch — their free verification ends on the 16th birthday.
Child profiles: For children under 16, verification is free and runs without an ID check: an already verified personal profile aged 18+ in the same user account confirms the child's data and thereby takes responsibility for it. If no adult profile in the account is verified yet, that has to happen first. The child's verification is valid until the 16th birthday — after that, the regular person verification applies.
AI Assistant
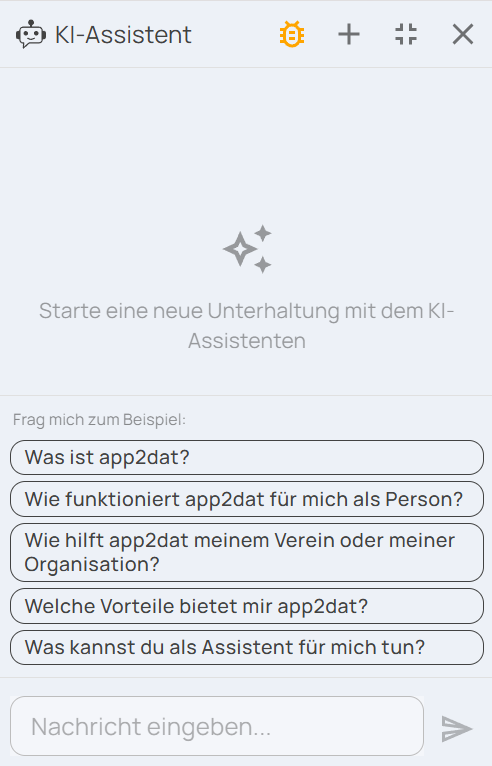
The robot icon at the top right opens the AI Assistant — your built-in help. It knows exactly which page you are on and answers in your language.
- Ask questions: "How do I sign my child up for training?" — the assistant explains the steps.
- Show elements: It highlights the matching buttons right in the app — the most important element lights up automatically after the answer.
- Tutorials: For common questions it suggests ready-made step-by-step guides — instantly, without waiting.
- Run solutions: If a prepared automation exists for your request, it offers to run it at the press of a button.
The buttons below an answer stay available: you can click a suggested automation or guide again at any time — even further up the conversation. Only the button for an alternative answer belongs to the most recent answer and disappears as soon as you ask your next question.
This manual is the alternative to the assistant — both are based on the same knowledge. Simply use whichever suits you better.
Settings & security
Everything personal about your account lives in the user menu at the top right — the signed-in email address is shown at the top.
| Menu item | Function |
|---|---|
| New person / New organization | Create another profile under your account. |
| Data & security | Change password, two-factor authentication, devices, local data (details below). |
| Language | System language (automatic), German or English. |
| Theme | Light, dark or system setting. |
| Info | App version, terms of use, privacy policy, homepage. |
| Logout | Signs out this device. |
Security in detail
- Change password: Before every change a confirmation code is sent to your email — only then do you set the new password.
- Two-factor authentication (2FA): The switch under Data & security enables the additional email code at every sign-in. Recommended!
- Log out other devices: Ends all sessions except the current one — handy after switching or losing a device.
- Delete local database: Clears the offline cache on this device; your data stays on the server.
Keeping the web app up to date
In the web app the Info dialog compares your version with the current server version. If an update is available, a tap on Update is all it takes. If the web app ever hangs, Clear app cache in the user menu helps. The native apps update via the stores.
Legal texts: When the terms of use or privacy policy change, the app asks for your consent at startup — with links to both texts.
Help & support
AI Assistant
The fastest help right in the app: ask a question, get an answer with highlighted buttons — around the clock.
Club questions
Questions about your club's fees, sessions or groups are answered by your club's management — e.g. via private message.
For club managers
Running a club yourself? The Administration Manual explains management, members, fees and more.
Contact
General information is available at www.app2dat.com — including imprint and contact address.